
Integration of PVS-Studio analysis results into DefectDojo
- Converting a report to a DefectDojo-compatible format
- Uploading the PVS-Studio report to DefectDojo
- Viewing the PVS-Studio report in DefectDojo
- Handling false positives
- Quality Gate in DefectDojo
DefectDojo is a DevSecOps tool for tracking errors and vulnerabilities. It provides features for working with reports, including the ability to merge results, memorize false positives, and delete duplicate warnings. DefectDojo also can save metrics and track their changes in charts. With this tool, you can conveniently handle PVS-Studio analysis results and eliminate errors in code.
DefectDojo has several deployment options. Here's how you can install and configure it. This page contains general documentation.
Converting a report to a DefectDojo-compatible format
To work with the PVS-Studio report in DefectDojo, convert it to a special format.
To convert your report, use the PlogConverter.exe command line tool for Windows and plog-converter for Linux/macOS. With these tools, you can not only convert the PVS-Studio report to different formats but also additionally handle it. For instance, you can filter messages.
Here's an example of a command to convert a PVS-Studio report for DefectDojo using PlogConverter.exe (Windows):
PlogConverter.exe path\to\report.plog ^
                  -t DefectDojo ^
                  -o output\dir ^
                  -n converted_report_name
Here's an example of a command to convert a PVS-Studio report for DefectDojo using plog-converter (Linux/macOS):
plog-converter path/to/report.json \
               -t defectdojo \
               -o path/to/report.defectdojo.json \
               -n converted_report_name
Uploading the PVS-Studio report to DefectDojo
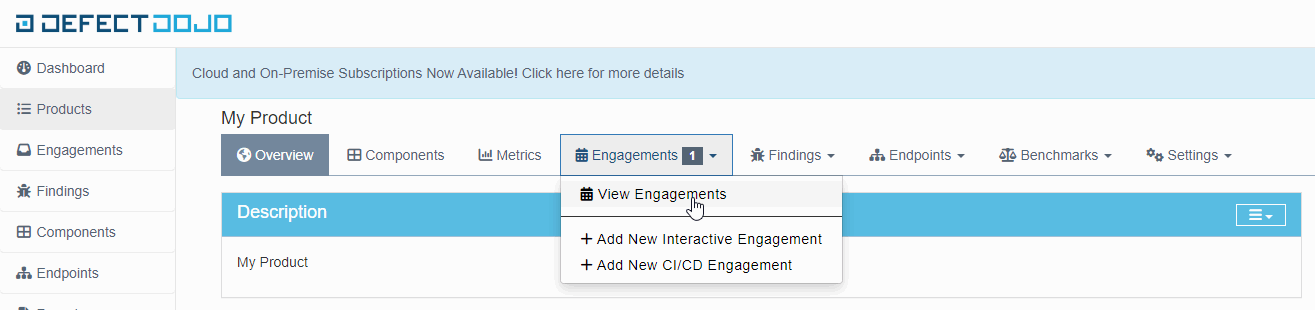
After you have converted the report, upload it to DefectDojo. To do that, add a new engagement in DefectDojo. The analysis results will be stored there. To add engagement, select 'Add New Interactive Engagement'.
Then, upload the report to the created engagement. You can use the DefectDojo API or manually upload the report.
To manually upload the report, open engagement, click the menu button in the 'Tests' table, and select 'Import Scan Result'.

In the opened window specify 'Generic Findings Imports' in the 'Scan type' field. In the 'Choose report file' field specify the report you want to upload.
Use the DefectDojo API to automate report uploading. Here's an example of a command to upload the report:
curl -X POST
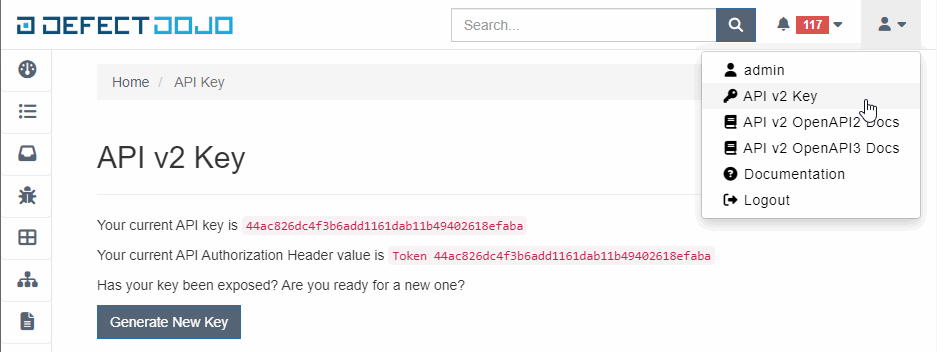
-H Authorization:"Token 44ac826dc4f3b6add1161dab11b49402618efaba"
-F scan_type="Generic Findings Import"
-F file=@"path/to/report.json"
-F engagement=1
-H Content-Type:multipart/form-data
-H accept:application/json defctdojohost/api/v2/import-scan/To get an authorization token, select 'API v2 Key' in the DefectDojo user menu.
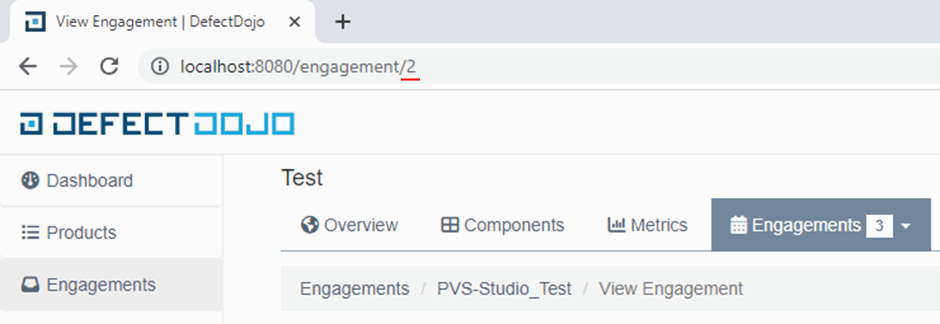
The engagement identifier to which the report should be uploaded is specified in the 'engagement' parameter. You can find the identifier in the URL of the selected engagement.
Specify the path to the report in the 'file' parameter.
Viewing the PVS-Studio report in DefectDojo
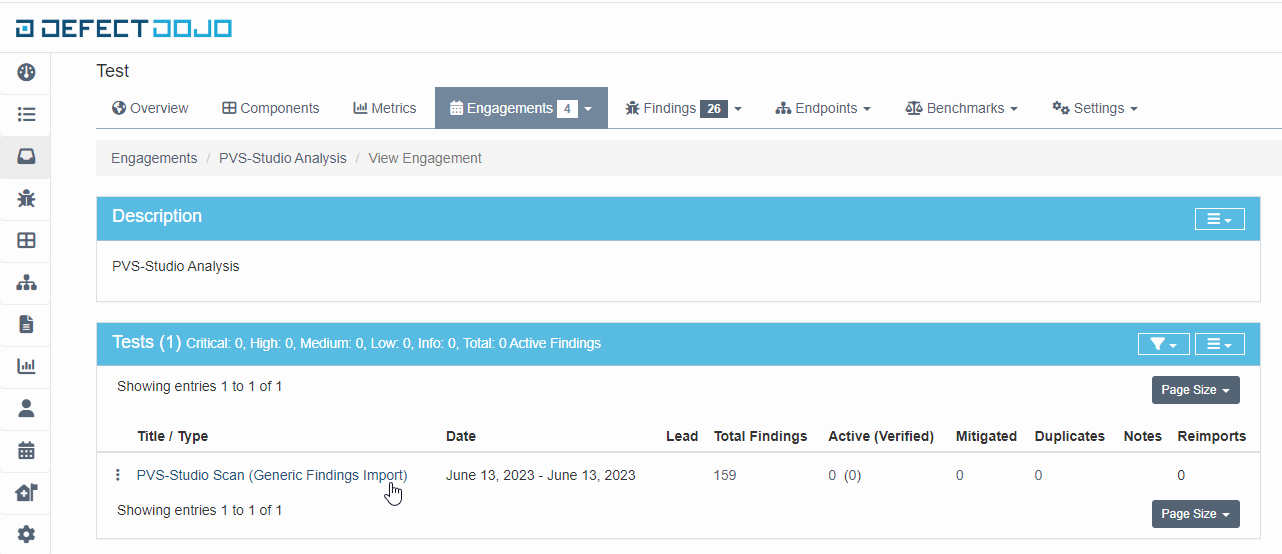
After uploading the report, you can view it in DefectDojo. Select the engagement to which the report was uploaded and open the necessary analysis result. The last uploaded report is the first in the list.
A page with a list of analyzer warnings opens.
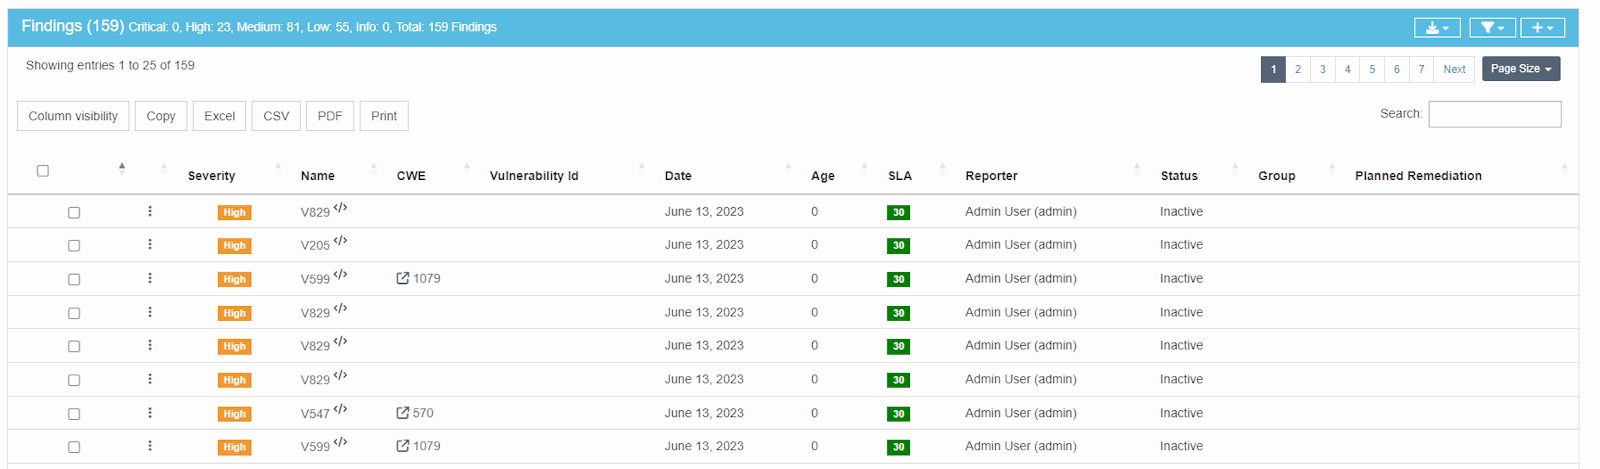
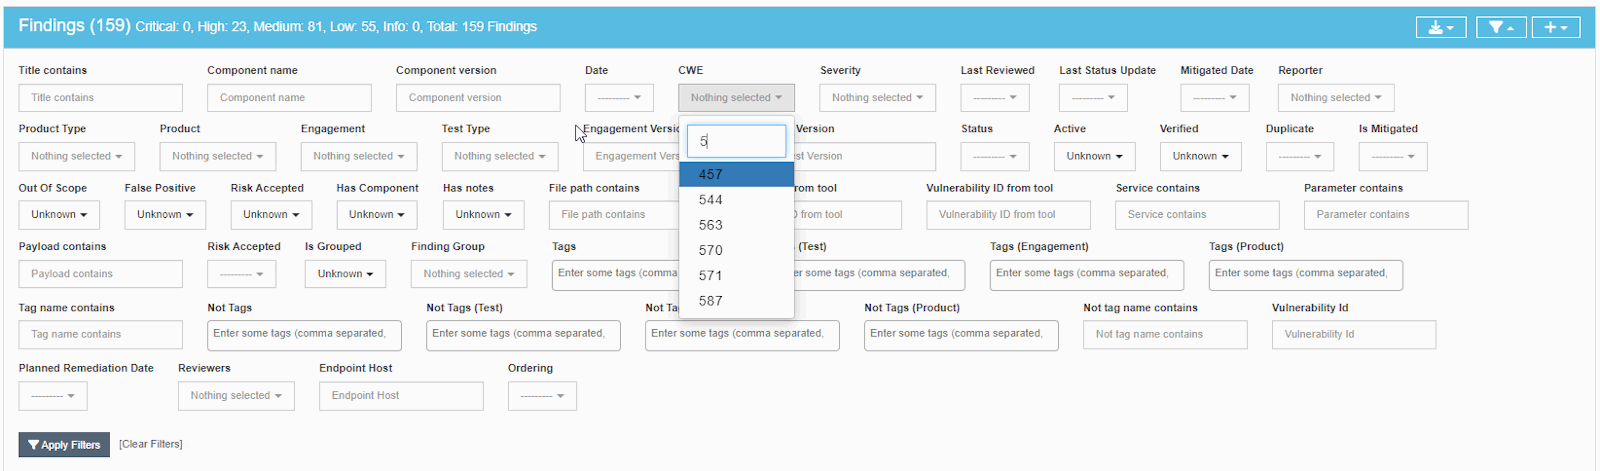
DefectDojo supports filtering and sorting warnings by various parameters. For example, you can leave only some diagnostic rules or warnings with a certain CWE identifier enabled.
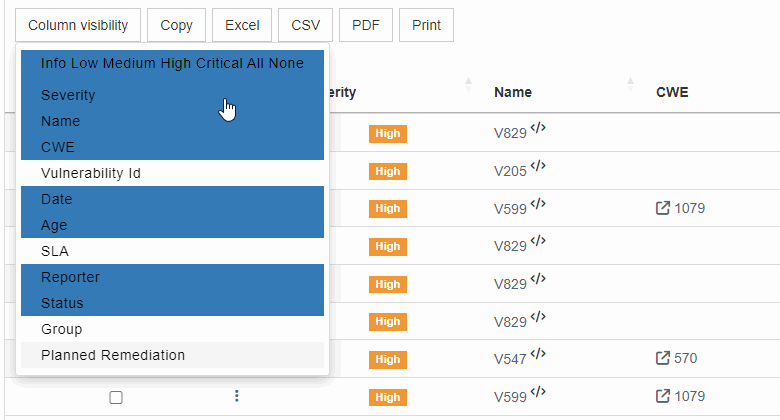
Click 'Column visibility' to open a menu with a list for hiding/displaying columns.
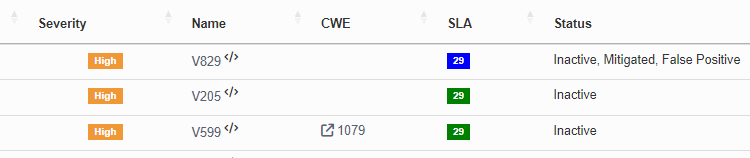
The 'Name' field contains the diagnostic rule number. Click it to see the detailed information about a warning.
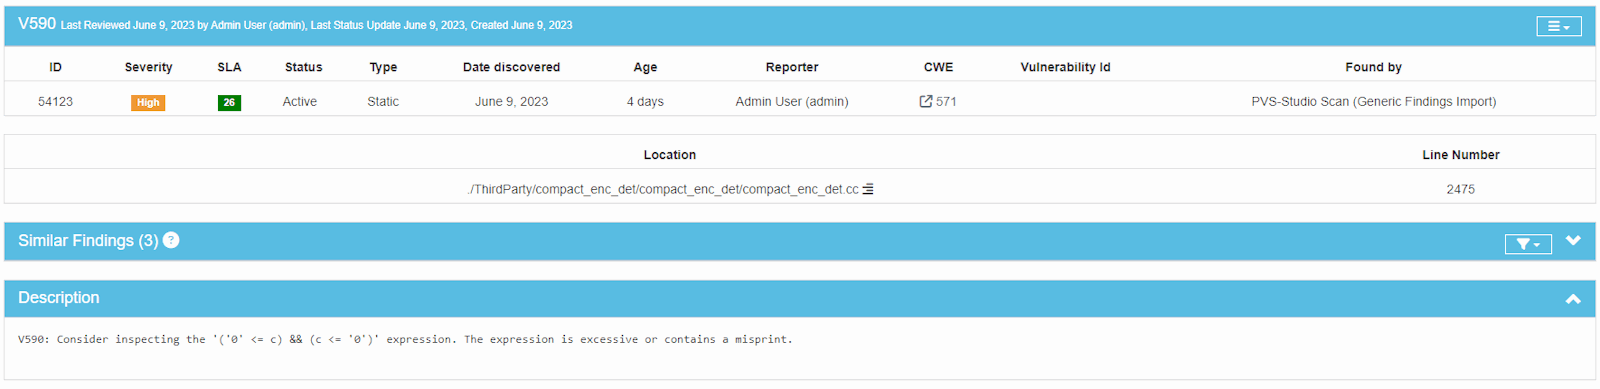
The opened page contains the following information:
- A warning's level of certainty;
- The warning's status;
- The CWE identifier and the link to the official Common Weakness Enumeration website with a description of an issue;
- The path to the file and the line of code to which the analyzer issued a warning;
- A brief description of the warning;
- A link to a detailed description of the warning on the PVS-Studio website.
Handling false positives
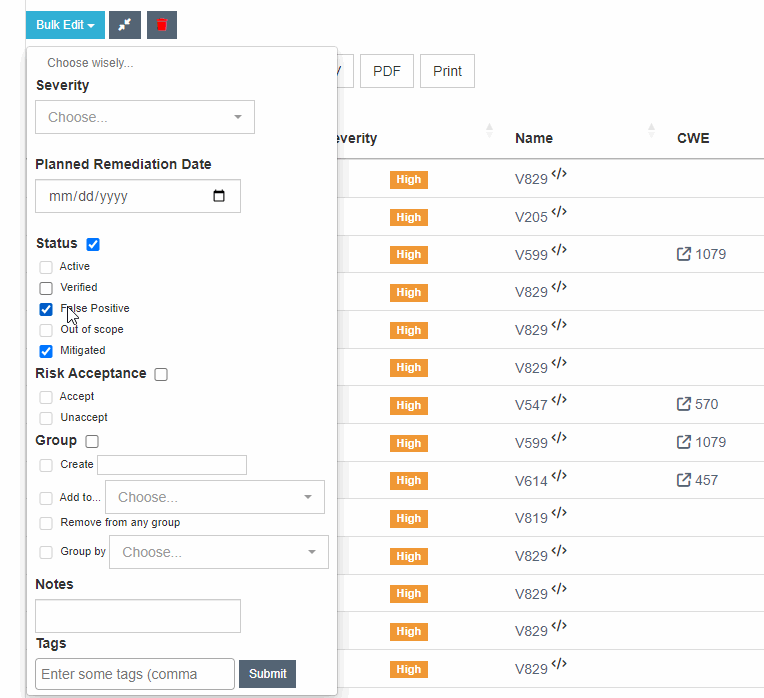
DefectDojo allows you to mark warnings as False Positives.
An additional DefectDojo configuration is required to save the markup of false positives when loading a new report.
Open the DefectDojo settings ('Configuration -> System Settings' or 'http://defectdojohost/system_settings') and enable the 'False positive history' option.
Then, add the following entry to the 'local_settings.py' file:
HASHCODE_FIELDS_PER_SCANNER=
{"PVS-Studio Scan (Generic Findings Import)":["unique_id_from_tool"]}
The file should be located in the 'dojo/settings/' directory. If you are running DefectDojo via 'docker-compose.yml', put the ('local_settings.py') file in the 'docker/extra_settings/' folder. In this case, 'local_settings.py' copies to the 'dojo/settings/' folder when running the docker container.
These settings ensure that warnings marked as False Positive do not lose this status when a new report is loaded. The status does not change, even if the line of code that triggered the analyzer has shifted.
You can also enable the 'Deduplicate findings' setting. In this case, when the report contains an already loaded warning, it will have the additional 'Duplicate' status.
To mark a warning as false, you need to click it, then click the 'Bulk Edit' button, select the 'Status' and 'False Positive' items.
Quality Gate in DefectDojo
Quality Gate indicates whether a project's code complies with the threshold values of metrics. In DefectDojo, you can't configure Quality Gate using the Web interface. However, with the help of API, you can get the necessary information to implement Quality Gate.
An example of the script for using Quality Gate in DefectDojo is here.
For the script to work, set these environment variables:
- DD_HOST — the DefectDojo host address,
- DD_API_TOKEN — the current API v2 Key
This is how you can run the script:
python ./qualitygate.py --engagement 6 --critical 0 --high 10 ^
                        --medium 50 --low 250
'engagement' is the number of the engagement to which the report is uploaded.
'critical', 'high', 'medium', 'low' are the thresholds for the number of PVS-Studio warnings at different certainty levels.
The script gets the latest report from the provided engagement and determines the number of messages by their certainty levels. After this, a check is carried out to ensure that the number of warnings is less than the ones received.
As we can see, the script in the example above will return code 1 if the report contains at least one Critical warning or more than 10 High, 50 Medium, 250 Low warnings.
You can set your Quality Gate logic by changing the quality_gate() function.
Was this page helpful?